10 Simple Steps to Crafting Your Litter Stick at Home: Crafting Benefits, Materials, Assembly & More
Ever wondered how to turn everyday items into useful tools? What if you could create your litter stick right at home, hassle-free and eco-friendly? In just 10 simple steps, you can craft a handy litter stick that helps keep your surroundings clean while unleashing your DIY creativity. No need for fancy equipment or expert skills – just a dash of enthusiasm and a sprinkle of resourcefulness. Ready to transform mundane objects into practical solutions? Let’s dive in and discover the art of crafting your very own litter stick from the comfort of your home.
Crafting Benefits
Materials Overview
Crafting your litter stick at home requires a few key materials. Choosing durable and lightweight items is crucial for the tool’s effectiveness. Opt for sturdy materials like PVC pipes, wooden dowels, or aluminum rods.
For eco-conscious crafters, there are several options for eco-friendly materials, like leaf litter, to consider. Bamboo sticks are sustainable and biodegradable, making them an excellent choice for environmentally friendly litter sticks. Recycled plastic handles or grips can also be used to reduce waste while creating a functional tool.
When crafting your litter stick, remember that the quality of the materials will determine its longevity and usability. Opting for durable yet lightweight components ensures that your homemade litter stick will be efficient in picking up trash without being too heavy to handle easily.
Selecting Materials
When crafting your litter stick at home, the stick choice is crucial. Consider the recommended length and thickness for optimal performance. Opt for a sturdy stick to ensure durability during use. A strong stick will withstand repeated use without breaking easily.
For fasteners, various types are commonly used in crafting litter sticks. Each option has its advantages and disadvantages, so choose wisely based on your needs. Securely attaching Components with fasteners ensures the litter stick remains intact during clean-up activities.
Understanding the purpose of barbs on a litter stick is essential. Different types of barbs are available, each varying in effectiveness when grabbing litter. When selecting barbs, consider their size and shape carefully to maximize efficiency in picking up trash effectively.
Preparing the Stick
Wood Cutting
To make your ladder stick, start by cutting the wood to the desired length. Use tools like a saw for this step. Safety first! Wear protective gear like goggles and gloves. Make sure to measure twice before cutting to avoid mistakes.
For clean cuts, ensure your saw blade is sharp. Consider using a miter box for straight cuts. Sand any rough edges after cutting for a polished finish. A smooth surface prevents splinters and ensures safe handling while picking up litter.
Sanding Edges
Sanding the edges of your stick is crucial for safety and comfort. Choose sandpaper with grit levels between 80-120 for initial sanding and 180-220 for finishing touches. Rub the Sandpaper along the edges gently in a back-and-forth motion.
Smooth edges prevent accidental injuries when using the litter stick outdoors or around children. Take your time with this step to achieve optimal results that enhance both functionality and aesthetics.
Assembling Components
There are various methods you can use to attach additional components securely to your litter stick. You can opt for gluing the parts together using strong adhesive or screws for a more durable connection. Make sure to consider the positioning and alignment of the fastened pieces, ensuring they are straight and stable.
Testing stability is crucial in ensuring your litter stick is robust enough for its purpose. To check stability, apply pressure on different parts of the stick or perform a weight test by hanging objects from it. If any instability issues arise, troubleshoot by reinforcing weak joints with extra glue or adding support brackets where needed.
Adding Barbs
Positioning Barbs
To ensure optimal grabbing ability, position the barbs strategically along the stick. Consider factors like hand size and reach when spacing them. Mark positions accurately by using a measuring tape or ruler.
When determining where to place the barbs, think about how far apart they should be based on your comfort and convenience. For instance, if you have smaller hands, closer barb spacing might work better for you. To mark positions precisely, use a pencil or tape to indicate where each barb should go.
Securing Barbs
Securely attach the barbs to the stick using reliable methods such as glue or screws. Reinforce these attachments with additional materials like wire or brackets to prevent them from coming loose during use. Choose fasteners that are durable and suitable for securing different types of materials together.
When attaching the barbs, consider reinforcing their connection with extra support to make sure they stay in place while picking up litter. Use strong adhesives or screws along with brackets or wires for added stability. Select fasteners that match both the material of your stick and the type of barb you are adding.
Customizing Design
Painting Stick
Benefits include adding a protective layer and improving aesthetics. To paint effectively, clean the stick thoroughly, apply primer if needed, then use acrylic or outdoor paint for durability. Choose colors that stand out for visibility and finishes like gloss for easy cleaning.
For adding grips to your litter stick, consider enhancing comfort and control while using it. Grips come in various types such as foam or rubber handles. Installation methods may involve sliding on or adhesive application. Select grips based on personal preferences like texture and ergonomics.
Adding Grips
Adding grips is crucial for enhancing comfort when using your litter stick. Different grip types offer varying levels of cushioning and traction to improve usability. Consider factors like material durability and thickness when choosing grips that suit your needs best.
Crafting Litter Tongs
Tongs Introduction
Litter tongs are an essential addition to a homemade litter stick, especially for picking up larger items efficiently. By incorporating tongs into the design, you can easily grasp and remove objects that may be too big or heavy to pick up by hand. There are various types of tongs available, including claw-style tongs for grabbing bulky items and scissor-action tongs For more precision in picking up smaller pieces.
When assembling the tongs onto your litter stick, it’s crucial to follow a systematic approach to ensure they function effectively. Begin by gathering the necessary tools such as screws and a screwdriver for assembly. Prioritize safety by wearing protective gear like gloves during the process. To align the tongs properly on the stick, consider measuring and marking where they should be attached before securing them in place securely with screws.
Tongs Assembly
To assemble the tongs onto your litter stick successfully:
- Start by positioning the open end of the tong mechanism at one end of your stick.
2. Secure it tightly using screws while ensuring it is straight and aligned with the direction of your reach.
3. Repeat this step for attaching any additional tongue mechanisms along the length of your stick.
4. Test each tool’s functionality by gripping various objects to confirm proper alignment.
Usage Tips
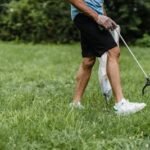
Effective Grabbing – When using your crafted litter stick, make sure to grip it properly to grab different types of waste securely. For instance, use the proper gripping methods depending on the size and weight of the litter. Troubleshooting tips can help if you face difficulties in grabbing specific items.
- Securely hold various waste types
- Adapt grip based on litter size
- Troubleshoot issues with grabbing certain items
Maintenance Advice – To ensure your crafted litter stick’s longevity, focus on proper care and maintenance. Regularly clean the stick and barbs to keep them free from debris or residue. Conduct regular inspections for any signs of wear and tear that might require repairs.
Environmental Impact
Reducing Litter
Using a litter stick is crucial in reducing litter pollution. By picking up trash with a litter stick, you prevent it from harming wildlife and polluting the environment. Raising awareness about the detrimental effects of littering can encourage others to adopt responsible waste disposal habits.
Educating your community about the impacts of littering and organizing clean-up events using homemade litter sticks can make a significant difference. Initiatives like creating anti-littering campaigns or partnering with local schools to teach students about proper waste disposal management are effective strategies for combating litter pollution.
Promoting Recycling
Incorporating recycling efforts into your litter picking activities amplifies their impact on the environment. Educate others on how recycling reduces waste in landfills and conserves resources. Collaborating with local recycling centers or organizations strengthens recycling initiatives within your community, promoting sustainable practices alongside cleaning up littered areas.
Conclusion
Final Remarks
You’ve got all the tools and know-how to create your very own litter stick now. Crafting one isn’t just about picking up trash; it’s about making a difference in your community, one piece of litter at a time. So, grab those materials, get crafty, and start cleaning up the world around you with your unique litter stick!
Remember, small actions like this can have a big impact. Every bottle cap or candy wrapper you pick up is one less eyesore in your neighborhood and one step closer to a cleaner environment for everyone. So, go ahead, put. Use your DIY skills to good use, and show the world how one person with a simple tool can make a world of difference.
Frequently Asked Questions
How can hand collecting help the environment by tapping into crafting your own litter stick?
Crafting your litter stick reduces plastic waste from disposable options, contributing to a cleaner environment. By reusing materials and creating a tool that helps pick up trash, you actively participate in environmental conservation efforts.
What kind of materials, like a plastic bag, are suitable for making a litter stick at home?
You can use sturdy materials like wooden dowels or recycled metal rods as the main stick. For components like barbs and grips, consider using durable plastics or metals. Ensure all materials are lightweight yet strong enough for picking up litter effectively.
Is it difficult to assemble the components of a homemade litter stick?
Assembling the components is straightforward with basic tools like glue or screws. Follow step-by-step instructions carefully to ensure proper attachment of each part. It’s akin to putting together pieces of a puzzle – simple but rewarding once completed.
Can I customize the designs of my homemade litter stick?
Absolutely! You have creative freedom in customizing colors, patterns, and even adding personal touches like stickers or engravings. Make it uniquely yours while ensuring functionality remains intact. Crafting your litter stick allows for both utility and self-expression.
Are there any specific tips for using a homemade litter stick effectively?
When using your DIY litter stick, focus on areas with high foot traffic or near water bodiesn where trash accumulates frequently. Bend at the knees instead of straining your back when picking up debris to avoid discomfort. Practice makes perfect in mastering its usage efficiently.